How do I disable TrustedInstaller in Windows 10?
- Windows 7 / Vista / XP. Select Command Prompt from the list. Windows 10 / Windows 8.
- When a new window shows up, click Next and select your restore point that is prior the infiltration of TrustedInstaller. After doing that, click Next.
.
People also ask, how do I remove TrustedInstaller from Windows 10?
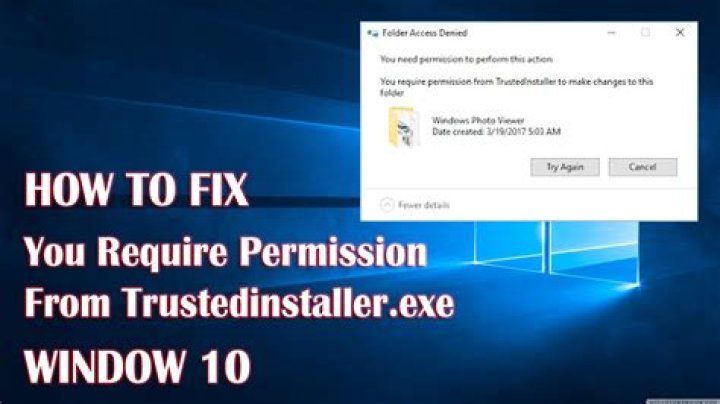
To delete a file or folder protected by TrustedInstaller in Windows 10, right-click and go to Properties. Now, click on the Security tab and head over to Advanced. Click Change to proceed further.
Beside above, what is TrustedInstaller on my computer? TrustedInstaller is a built-in user account in Windows 8, Windows 7, and Windows Vista. This user account “owns” a variety of system files, including some files in your Program Files folder, your Windows folder, and even the Windows. old folder that is created after you upgrade from one version of Windows to another.
Then, how do I disable TrustedInstaller?
How to Disable TrustedInstaller.exe
- Go to Start and then select Control Panel.
- Turn on Classic View.
- Select Problem Reports and Solutions.
- Click Clear Solution and Problem History in the left panel.
- Confirm your decision.
- Exit the Problems Reports and Solutions Window and Control Panel.
Is TrustedInstaller a virus?
TrustedInstaller is original Windows process, but is often abused by malware. TrustedInstaller is a built-in user account that regulates permissions. However, malware can corrupt, damage, or replace the file. TrustedInstaller is a legitimate Windows process and is a part of Windows Resource Protection (WRP) technology.
Related Question AnswersHow do I force delete a file in Windows 10?
Force delete using Windows In the dialogue that appears, type cmd and hit Enter again. With the command prompt open, enter del /f filename , where filename is the name of the file or files (you can specify multiple files using commas) you want to delete. There are more details on advanced deletion methods here.What is a TrustedInstaller?
TrustedInstaller.exe is a process of Windows Modules Installer service in Windows 10/8/7/Vista. Its main function is to enable installation, removal and modification of Windows Updates and optional system components. But sometimes even Windows Resource Protection service, which runs the system file checker is affected.How do I delete a file without permission?
Published on Nov 16, 2009- Create a folder called "Windows.old"
- Move files that cannot be deleted into that folder.
- Run Disk Cleanup in Start - All Program - Accessories - System Tools (or Search in the Start menu)
- Choose the drive where the Windows.old file is located and click OK.
How do I override TrustedInstaller?
But If you know what you are doing and persist in your action, here is how to claim the privilege from TrustedInstaller:- 1) Right click on the file or the folder you want to change or delete, and select Properties.
- 2) On Properties window, open Security tab and then click on Advanced.
How do I give permission to TrustedInstaller?
- Right mouse button click on the file and choose Properties.
- Click Security tab.
- Click Advanced button.
- Click Owner tab.
- Click Edit button.
- Click Other User or Group and type in NT SERVICETrustedInstaller.
- Press Ok on all dialogs until all property dialogs are closed.
How do I turn off inheriting permissions?
- Click Properties.
- Click the Security tab.
- Click Advanced.
- Click Change Permissions…
- Uncheck/Check Includeinheritable permissions from this object's parent.
- Click OK.
- Click OK.
Why is TrustedInstaller the owner?
By default, a built-in system account "TrustedInstaller" has ownership and full control of all system files in Windows Vista, Windows 7 and later OS, so you need to take ownership and assign full permission to yourself before modifying or replacing the system file. Taking ownership of a file or folder is very easy.Can I kill TrustedInstaller EXE?
Bring up your Task Manager by pressing on Ctrl + Alt + Del or Ctrl + Shift + Esc simultaneously. On the Processes tab, look for and select trustedinstaller.exe. Click End process to kill trustedinstaller.exe. Note: You will now have to manually search for and install updates.Can I end process TrustedInstaller EXE?
TrustedInstaller.exe high CPU usage problem happens in random, and normally only last a few minutes. The system process cannot be ended (killed or terminated) or have it's priority altered to low or below normal. TrustedInstaller simply run like a realtime task, make Windows slower and grinds to a halt.Do I need TrustedInstaller EXE?
TrustedInstaller.exe is a process that belongs to Windows Modules Installer and one of the core components of the Windows Resource Protection. It's included in every version of Windows since Vista. Because TrustedInstaller is a legit Windows component, you don't need to uninstall it or change it in any way.How do I create a TrustedInstaller owner?
How to restore TrustedInstaller ownership to system files- Open File Explorer.
- Browse to the system file you previously changed ownership.
- Right-click the file, and select Properties.
- Click on the Security tab.
- Click the Advanced button.
- On the "Advanced Security Settings" page, click the Change link on Owner.
How do I get rid of TrustedInstaller virus?
Remove TrustedInstaller from Your Computer- The “Run” Window will appear.
- Go to the “Boot” tab.
- When prompted, click on “Restart” to go into Safe Mode.
- Open the Run Window again, type “regedit” and click OK.
- You can remove the value of the virus by right-clicking on it and removing it.
Why is TrustedInstaller EXE always running?
Trustedinstaller.exe high memory usage It is because of this during update times the trustedinstaller process uses a lot of CPU resources. You may also find trustedinstaller.exe consuming a major portion of CPU resources for some time after new updates have been downloaded. This again is normal behavior.How do I get permission to delete a file?
Steps to get administrator permission to delete folders- Navigate to the folder you want to delete, right click it and select Properties.
- Select the Security tab and click the Advanced button.
- Click on Change located at the front of the Owner file and click on the Advanced button.
How do I get system permission?
Here is how to fix “You require permission from SYSTEM to make changes to this file” on Windows 7 even when you are already an Administrator.- Right click on the folder (or file) what you want to delete which has this annoying problem – choose Properties.
- Go to “Security” tab – “Advanced”.
- Go to “Owner” tab – “Edit”
How do you fix administrator permissions?
Go to Start, Programs, Accessories, and right-click on the command prompt and choose Run as Administrator. Press Enter and restart your computer. Now try to perform the task again that gave you the “You do not have permission” error. If that does not work, then follow the steps below to change the file permissions.How do I delete system files?
You need to take ownership of the files, and then assign yourself rights to delete or modify the file. For this, we'll use the command line. Open an administrator command prompt by typing cmd into the start menu search box, and hit the Ctrl+Shift+Enter key combination.How do I sign in as administrator on Windows 10?
Enable or Disable Administrator Account On Login Screen in Windows 10- Select “Start” and type “CMD“.
- Right-click “Command Prompt” then choose “Run as administrator“.
- If prompted, enter a username and password that grants admin rights to the computer.
- Type: net user administrator /active:yes.
- Press “Enter“.